
Understanding Your AB Split Test Results Dashboard
Running an A/B test is only half the battle. The real value comes from reading your results correctly. The AB Split Test dashboard gives you a clear view of how each variation is performing, but if you’re new to testing the numbers might look confusing at first.
Here’s a breakdown of what each part of the dashboard means and how to use it.
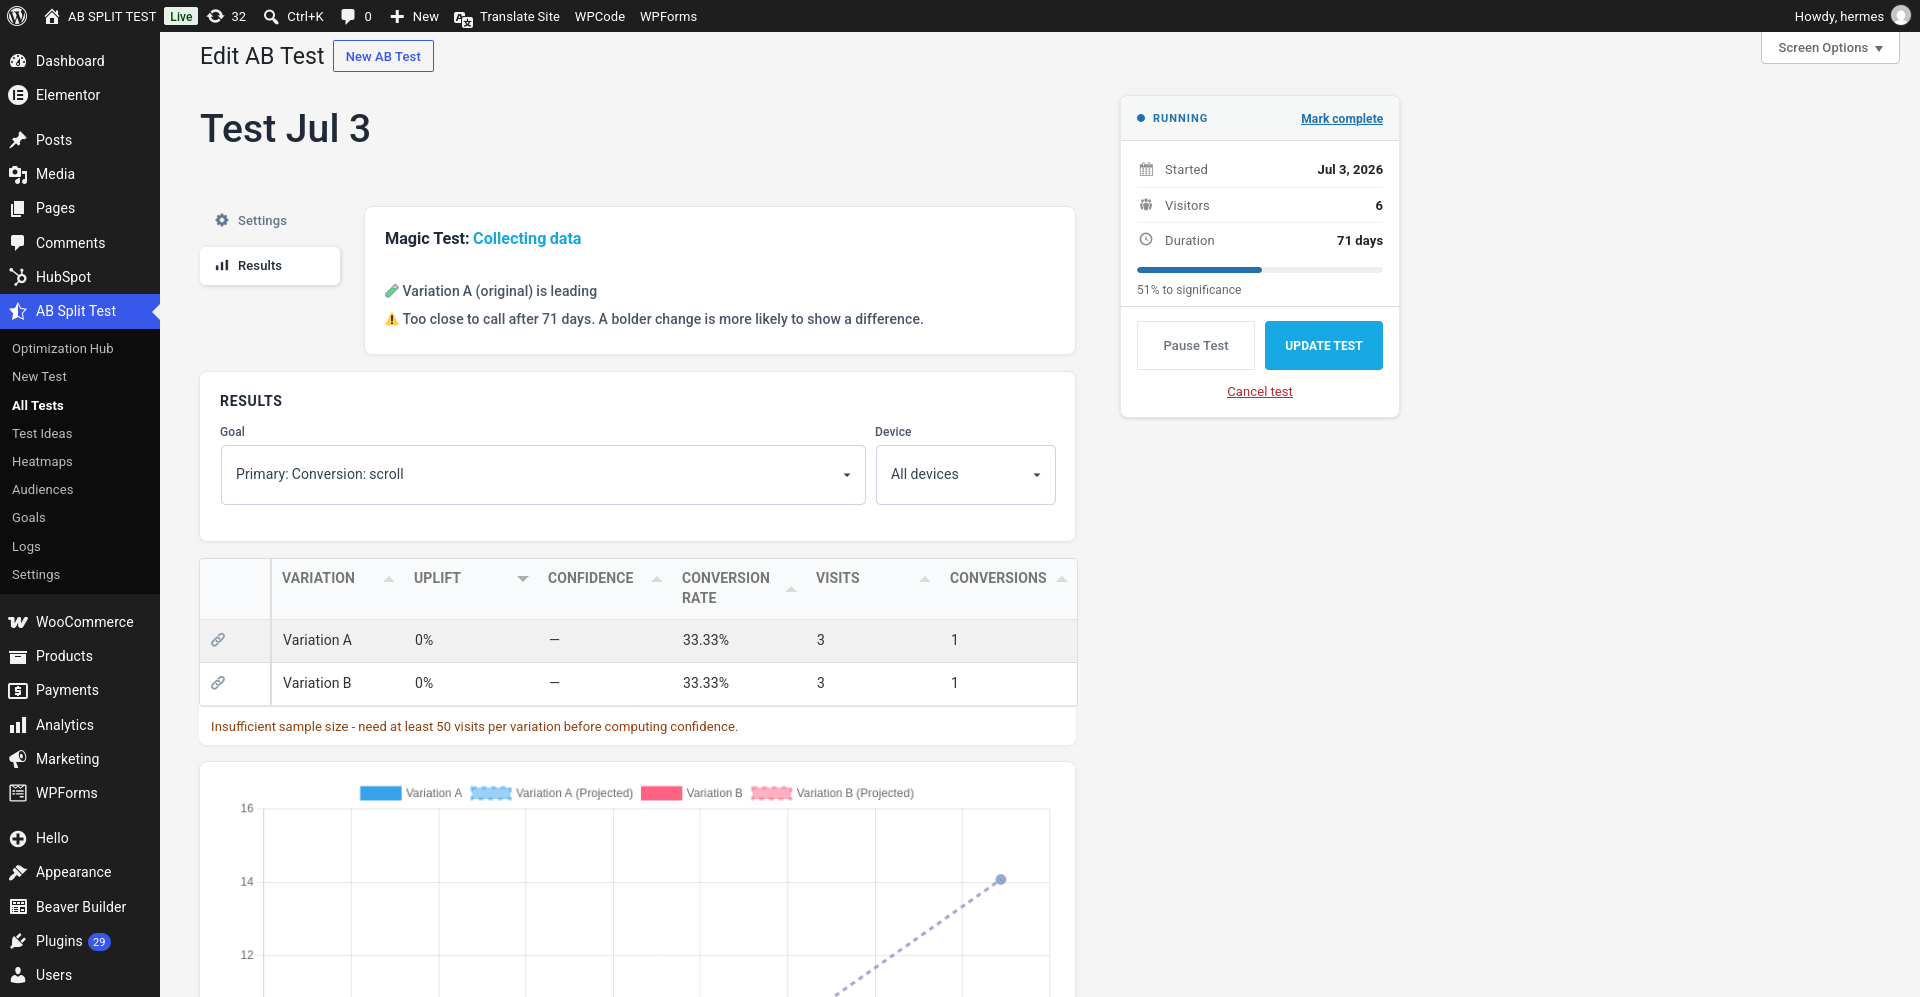
1. Status Banner
At the top of the results screen, you’ll see a status indicator. This tells you what stage your test is in:
-
Collecting data - the test is live and visits/conversions are being tracked.
-
Monitoring & Allocating Traffic - the test is live in Multi-Armed Bandit mode, steering traffic toward the leader as it learns.
-
Complete - you have marked the test complete. No new data is recorded.
-
Paused - the test is stopped for now. Visitors see the original and nothing is recorded.
The status card in the sidebar shows RUNNING, PAUSED or COMPLETE. While a test runs it lists when it started, how many visitors it has had and how long it has been running, with a bar showing how close it is to significance (for example 62% to significance).
Below the status you'll find an AI-written results summary that explains in plain words what the numbers say so far (hidden when AI is turned off), and the Share report box with a link to a public report.

2. Goal, Device and Audience Dropdowns
Every test can have one or more goals (conversions). For example:
-
A button click
-
A form submission
-
A “thank you” page view
-
A piece of text appearing on a page
The Goal dropdown lets you switch between the primary goal (Primary: …) and each sub-goal (Subgoal 1: …) to see how each variation performs against different metrics. Next to it, the Device dropdown filters the same results down to desktop, tablet or mobile visitors. If the test has audiences attached, the Audience dropdown switches from All eligible visitors to the results for one audience.

3. Results Table
The columns, left to right, are Variation, Uplift, Confidence, Conversion Rate, Visits and Conversions. Click any heading to sort by it.
-
Variation - Each row represents a version of your page or post. The first is usually the control (original), and the others are variations.
-
Visits - How many people saw this variation.
-
Conversions - How many times the selected goal was completed.
-
Conversion Rate - conversions ÷ visits, shown as a %. If you have turned on order-value optimisation this becomes Revenue / visit instead.
-
Confidence - how sure we are that this variation really is different from the control, rather than the difference being noise. This is the number to watch before calling a winner.
-
Uplift - The relative improvement (positive or negative) compared to the control.
Why does Confidence show a dash?
Confidence stays as – until every variation has at least 50 visits. Below that there simply is not enough data for the number to mean anything, and the table tells you so: “Insufficient sample size - need at least 50 visits per variation before computing confidence.”
That is working as intended. Keep the test running.
👉 In the example screenshot:
-
Both variations are sitting at the same conversion rate on a handful of visits each.
-
With such a tiny sample, uplift is 0% and Confidence is still a dash.
The takeaway? Don’t end a test too early. More data = more reliable results.
4. Conversion Graph
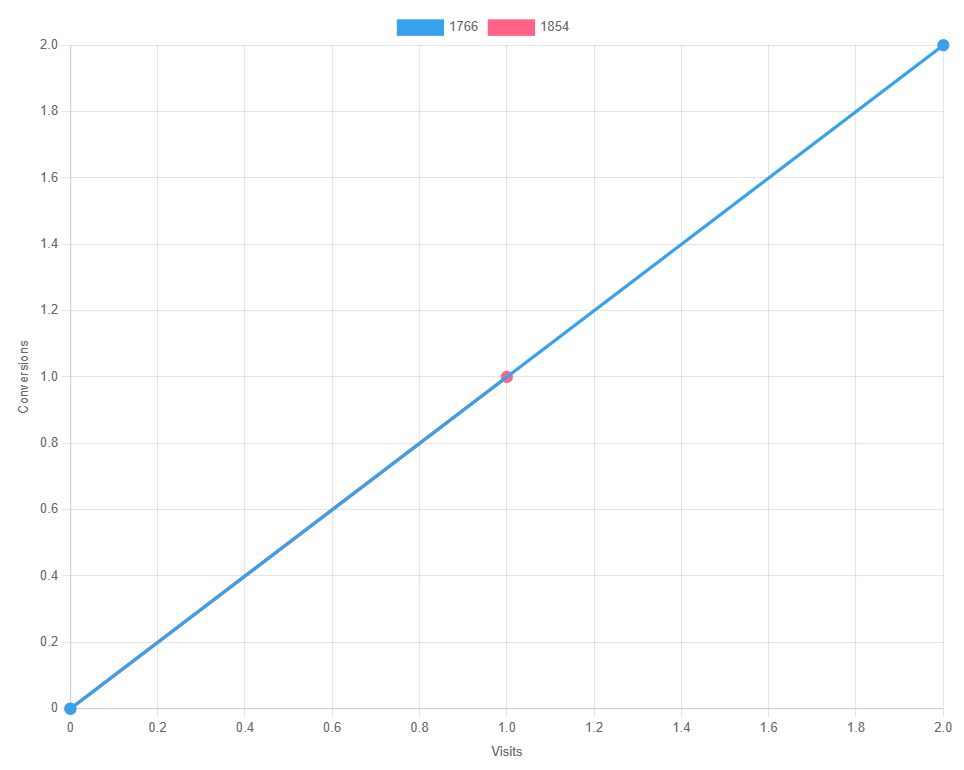
Below the table you’ll see a graph plotting visits (x-axis) against conversions (y-axis).
-
The steeper the line, the better the conversion rate.
-
Over time, you’ll be able to see which variation is trending ahead visually, not just in the numbers.
5. A Note on Statistics: Bayesian vs. Multi-Armed Bandit
You might notice that your tests can run in two different modes: Bayesian or Multi-Armed Bandit.
-
Bayesian gives you a Confidence figure once there is enough data to reach significance, and leaves the traffic split alone.
-
Multi-Armed Bandit (Dynamic Traffic Steering) shifts traffic automatically toward the best-performing variation as conversions come in, so you capture more wins while testing.
Both methods are powerful but serve slightly different purposes. We cover this in detail in our post: Bayesian vs. Multi-Armed Bandit: What’s the Difference?
Wrapping Up
The AB Split Test results dashboard is designed to be straightforward:
-
Status tells you what stage the test is in.
-
Goals let you measure different outcomes.
-
Results Table + Graph show you how each variation is performing.