
Creating an On-page test with WP Bakery
AB Split Test now seamlessly integrates with WP Bakery / Visual Composer, allowing you to perform split tests directly within your WP Bakery layouts.
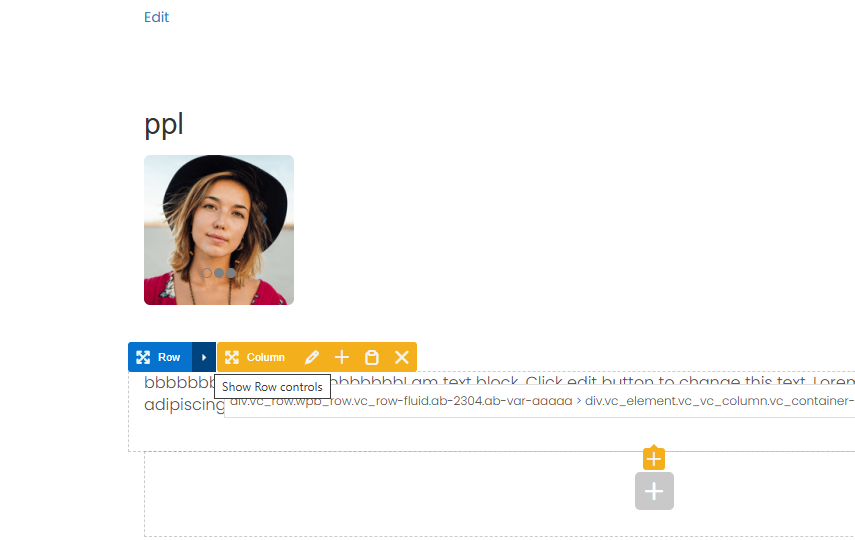
STEP 1. Access Row Settings:
- In the WPBakery editor, locate the row you want to test.
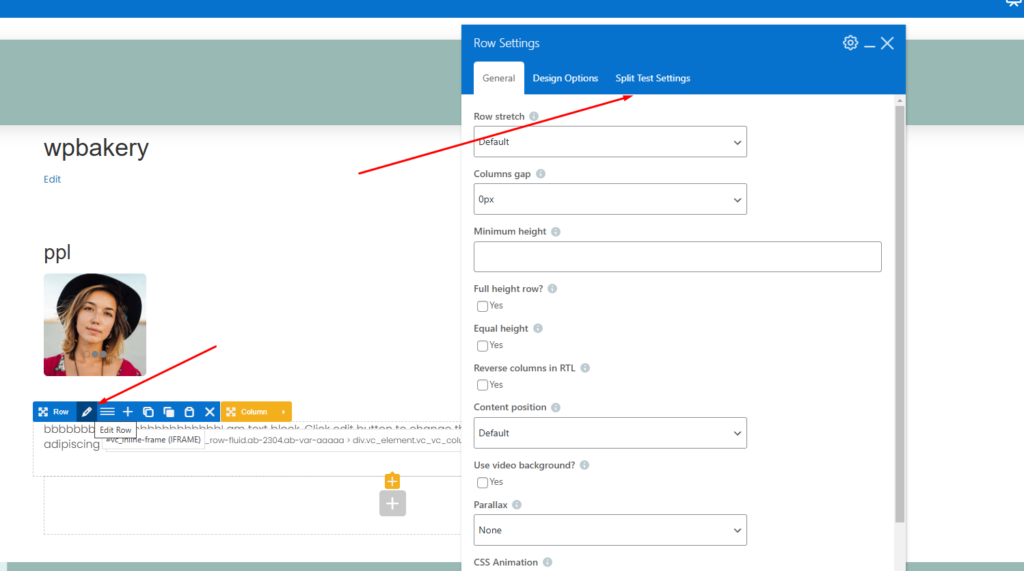
- Open Row Settings
STEP 2. Enable Split Testing:
- In the Row Settings panel, navigate to the Split Test Settings tab.
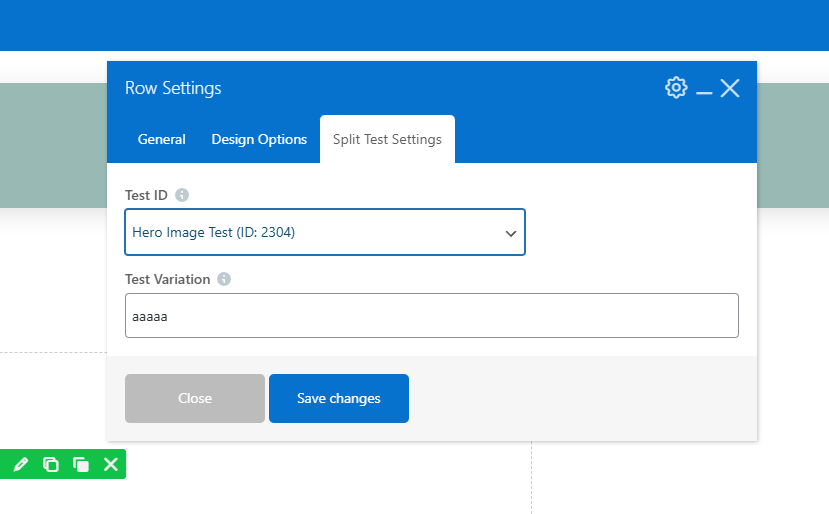
STEP 3. Assign the Row to a Split Test:
- Select a Test ID from the dropdown menu.
- Enter a Test Variation Name (e.g., “Hero Image A”).
STEP 4. Assign the Row to a Split Test:
- Duplicate the row or create a new one.
- Repeat steps 1-3, but assign a different Test Variation Name (e.g., “Hero Image B”).
STEP 5. Save Changes & Publish:
- Click Save Changes and publish your page.
This integration allows you to optimize your WPBakery layouts with data-driven testing—ensuring the best version of your content is shown to your audience. For more details on setting up tests, visit our documentation.
March 7, 2025 / /