
On-page split testing with any (or no) page builder - Using classes to tag variables
Use AB Split Test’s powerful on-page testing in almost any WordPress builder you like. All you need to do is be able to add classes to elements, then we can add rows to them.
NOTE: This is not drag-and-drop simple, and should be attempted if you have a familiarity with adding classes to elements or rows.
Create Your Test
Create a new test
- WP Admin > AB Split Test > New Test
- Choose On Page Elements for your test type.
- Configure the rest as you choose.
- Click Launch Test
Get Your Test Classes
Your test class is shown on the test screen, in the On Page Elements section under HTML Classes
it’ll be something like:
ab-var-1234-{yourvarname}
What’s it do?
It’s one class, in three parts:
- ab-var- tells AB Split Test this element is a test variation.
- 1234 is your experiment ID. It’s the post ID of the test you just published, and it’s different for every test you create.
- {yourvarname} is the variation name. It can be anything you choose - these are the labels that appear in your results.
Easiest to understand with examples, check em’ out below…
ab-var-1234-original - assigned to experiment 1234, with the variation name “original”
ab-var-1234-bold - assigned to experiment 1234, with the variation name “bold”
ab-var-2000-original - assigned to a different experiment 2000, with the variation name “original”
ab-var-2000-green - assigned to other experiment 2000, with the variation name “green”
Prefer a shortcode?
The test panel also gives you a shortcode that writes the same class for you:
Buy Now!
See Shortcodes for the full list.
Using the older two-class format?
Older versions of AB Split Test used two separate classes - ab-1234 ab-var-original - one for the experiment ID and one for the variation. Those still work, so you don’t need to go back and change existing tests. New tests should use the single ab-var-{testID}-{name} class shown in the test panel, because it can’t get separated from its ID.
You need at least 2 variations
A test is not a test with 1 option. Remember to create 2 options and give them different variation names, with the same experiment ID.
Add classes to your elements.
Now you know the classes you need to add to identify your experiment and variation, now add them to your elements. You can hardcode them in your themes, or use any page builder you like.
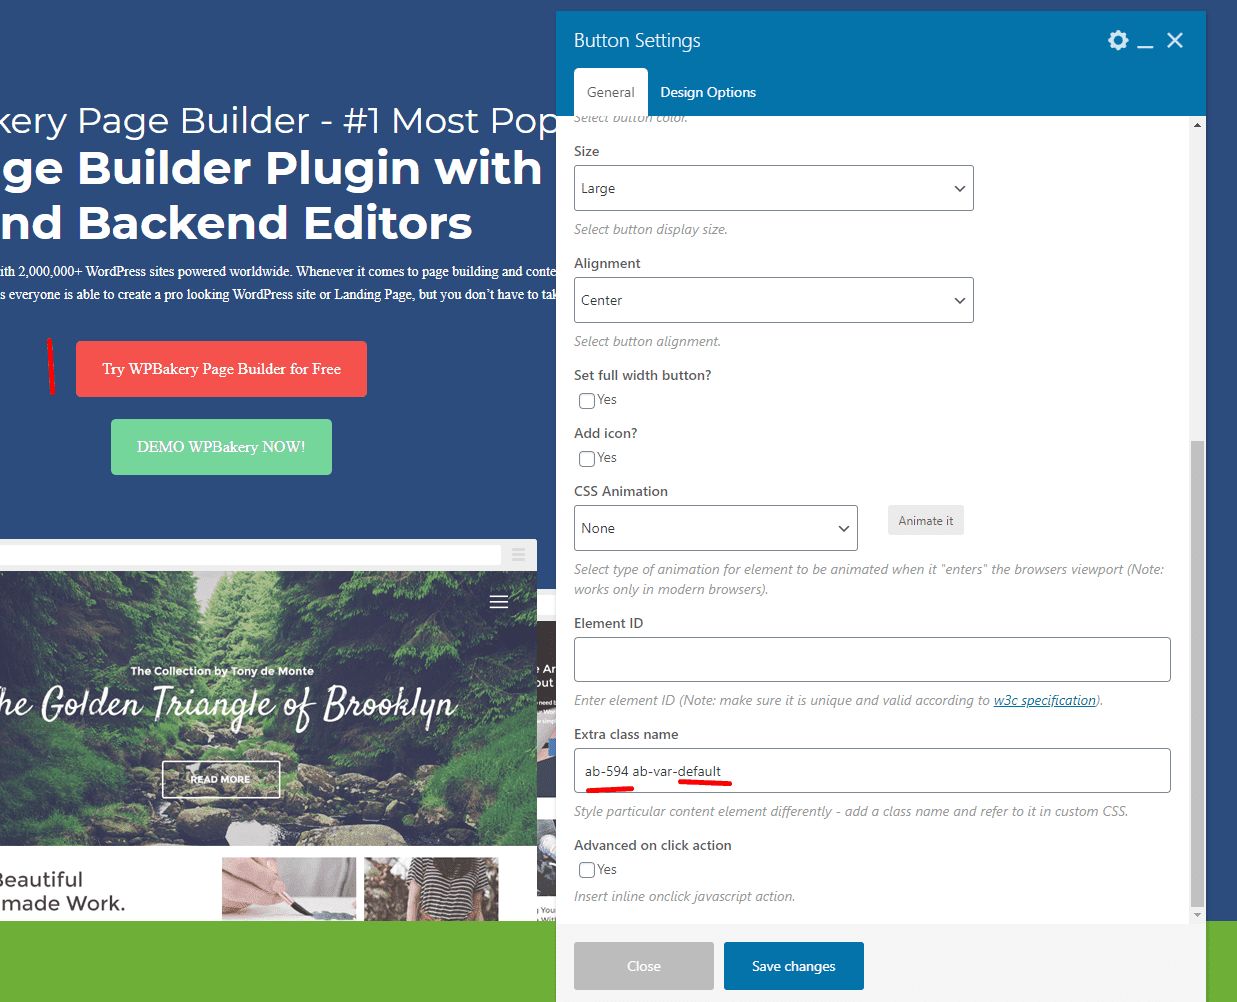
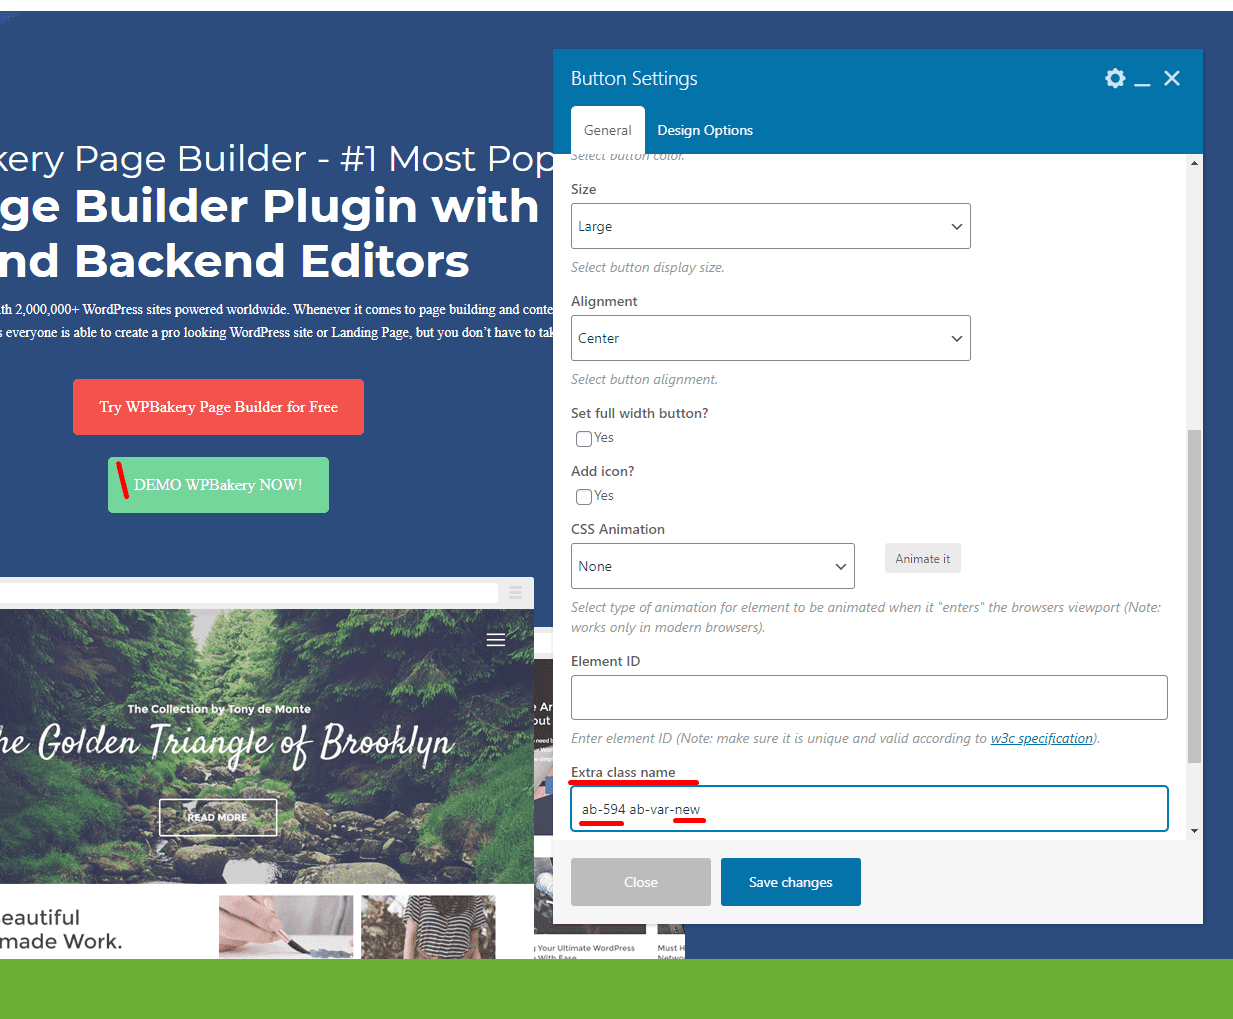
In the below screenshots, we’ve created 2 buttons with WPBakery Builder. Take a look and you’ll see we’ve added the test classes to each button. 594 is the test identifier, so it stays the same for both buttons, while new and default change to identify each variation.
Note: these screenshots were taken on an older version and show the legacy two-class format (ab-594 ab-var-new). On current versions you add the single class ab-var-594-new instead - both still work.
Things To Note
There’s not much error checking
Make sure you follow the above steps clearly, or you might miss something. Send us a link to your page if you are having trouble.