How to install the AB Split Test in your WordPress website

To install the AB Split Test plugin, first save a copy of the AB Split Test plugin .zip file somewhere on your computer.

Then go to your WordPress admin area and click ‘Plugins’:
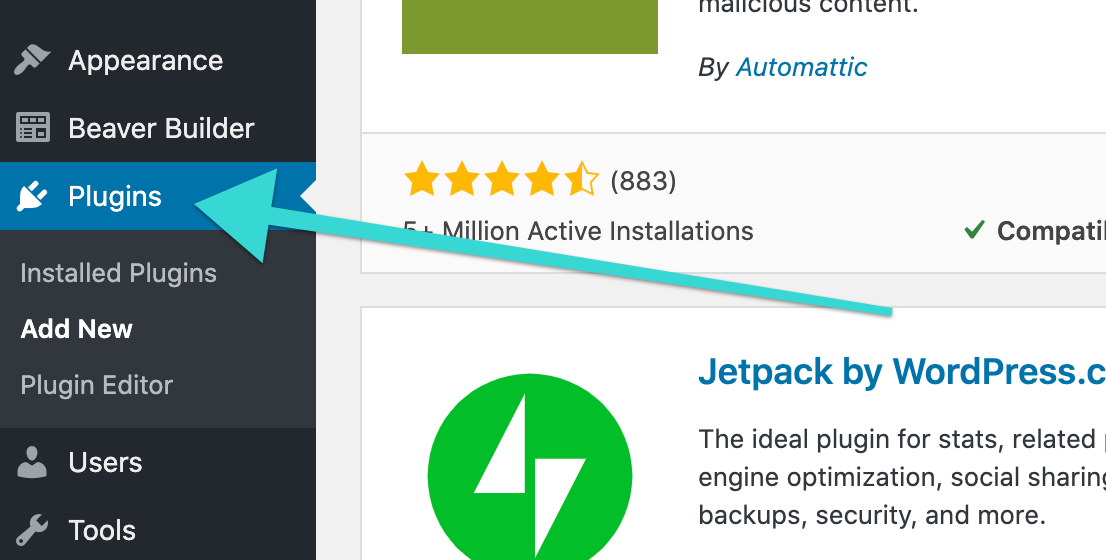
WordPress admin dashboard highlighting the Plugins menu and showing the Jetpack plugin with ratings and active installations.

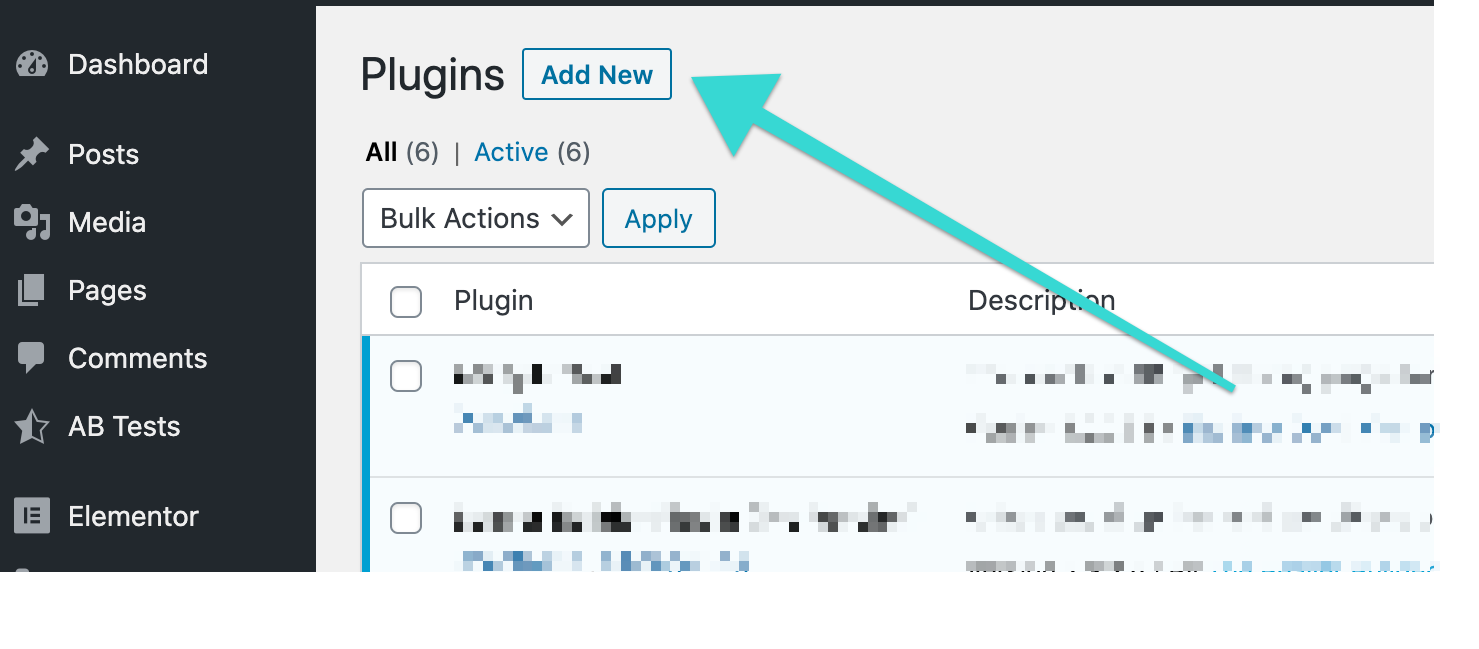
Click the ‘Add New’ button:

A WordPress Plugins page with an arrow pointing to the "Add New" button at the top, indicating how to add a new plugin.

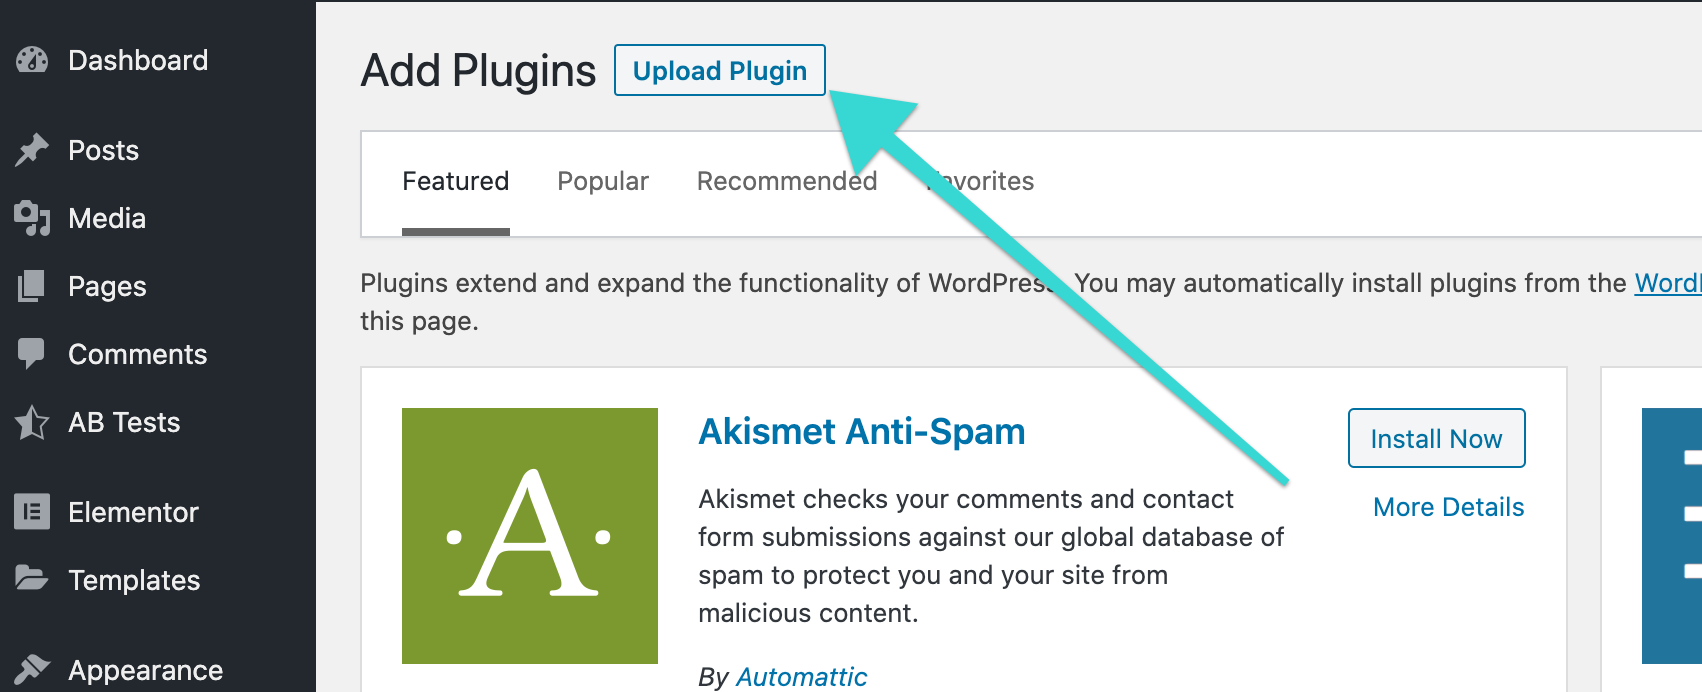
Click ‘Upload Plugin’:

WordPress admin page showing the "Add Plugins" screen with an arrow pointing to the "Upload Plugin" button.

 Then find the AB Split Test plugin .zip file that you saved earlier by clicking the ‘Choose file’ button, then click ‘Install Now’:
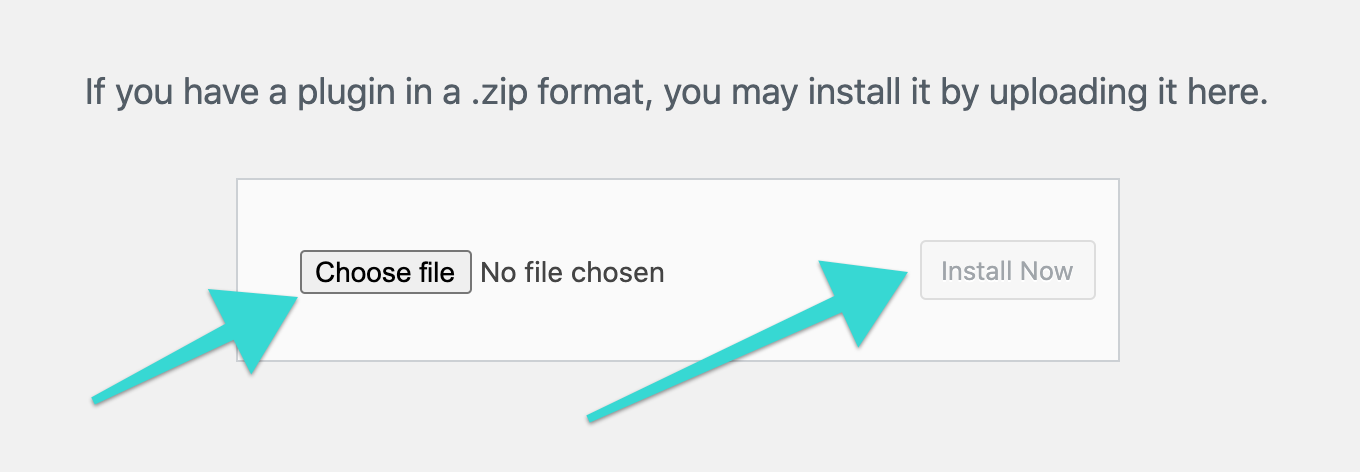
A file upload box with "Choose file" and "Install Now" buttons, and the text "No file chosen" displayed beside the upload button.

Finally, click on ‘Activate Plugin’ in make the plugin active:
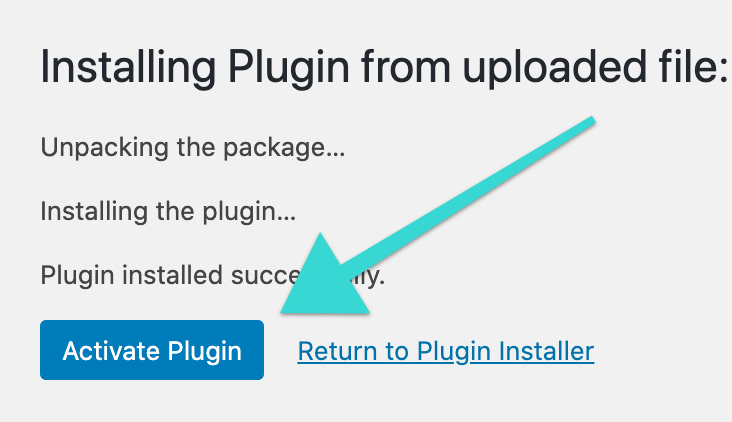
A large blue arrow points to the “Activate Plugin” button on a plugin installation confirmation screen.

You’ll know that you’ve successfully installed the AB Split Test plugin if you can see the plugin menu on the left:
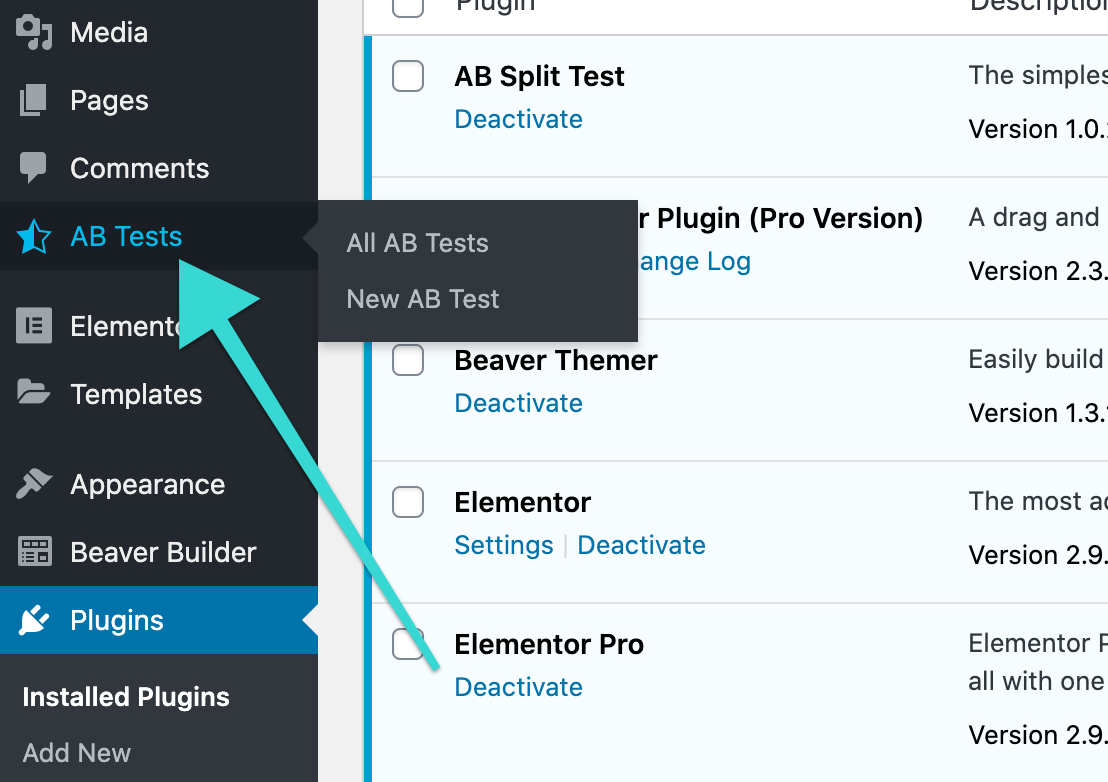
A menu in a WordPress admin dashboard highlights "AB Tests" under Plugins, with options for "All AB Tests" and "New AB Test," and Elementor Pro listed for deactivation.

Leave a Comment

You must be logged in to post a comment.